- Data Recovery
- Data Recovery for PC
- Data Recovery for Android
- Data Recovery for iPhone/iPad
- Unlock For Android
- Unlock for iPhone/iPad
- Android System Repair
- iPhone/iPad System Repair
Updated By Soha On Jul 4, 2026, 5:53 pm
Partition failure is a common problem that Mac users may encounter. Once it occurs, it will seriously affect the daily usage experience. The reasons for partition loss are diverse and often come without warning. With the help of powerful Mac partition recovery software, users can easily deal with such problems. If you are looking for the best partition recovery tool for Mac, you mustn't miss this article. We will provide you with a detailed introduction to the 5 best partition recovery tools for Mac, their specific uses, and the significant benefits they bring.
Before discussing the best partition recovery software options for Mac, it is necessary to understand the partition types, especially since macOS devices only support specific file systems.
- APFS: Apple's file system, suitable for macOS 10.13 and above devices that use SSDS and modern flash drives. This system has advantages such as more rapid adjustment of directory size and powerful encryption functions.
-MS-DOS (FAT) /exFAT: Created by Microsoft, these two file system versions are supported on macOS devices and are mainly used for external storage devices with a storage capacity exceeding 4GB.
-HFS + : Also known as Mac OS Extension, it is the default file system type based on logs and is applicable to macOS 10.12 and earlier versions.
There are various situations that may lead to the deletion or loss of partitions on macOS devices. Common causes are as follows:
- Damaged partition table: After disk partitioning, a partition table is generated for users to refer to and identify disks. If there is a problem with the partitioned table, it is easy to cause partition loss.
- Hardware issues: Overheating or surface damage to the hard disk can impair its hardware condition, thereby affecting its performance.
- Virus/Malware attack: Some viruses or malware can damage disk drives, resulting in partition loss.
- Accidental deletion: If a user mistakenly performs a deletion step, the partition may be lost.
- Unexpected system crash or power outage: If the device experiences an unexpected power outage or power failure during formatting or partitioning, it will cause serious problems such as data loss.
There is no need to panic when facing the problem of disk partition failure. If Mac users want to efficiently recover deleted partitions, they can rely on the help of professional software. Here are 5 tools we have carefully selected that perform well in partition recovery. You can choose the software that suits your needs.
Geekersoft Data Recovery is a high-quality data recovery software suitable for all types of users. It has outstanding performance in the field of partition recovery and can accurately detect and successfully recover various types of files. By using this software for partition recovery, users can enjoy the guarantee of zero data loss. Its fast selection and recovery process, as well as the deep scan function, provide users with an efficient and reliable recovery experience. In addition, before the official restoration, the software also provides additional preview support, allowing users to confirm the file content in advance to ensure that the restored files are exactly what they need.
The main highlights of Geekersoft Data Recovery:
- Outstanding deep scanning capability: Equipped with an enhanced deep scanning function, it can deeply search for damaged, lost and deleted files. Even old files that have been around for a long time can be precisely located and restored.
- Wide compatibility: Compatible with a variety of MacOS-based SSDS, including those running the Apple T2 chipset, ensuring stable operation on Mac devices with different hardware configurations and providing users with comprehensive partition recovery support.
- Flexible selection and recovery: Users can freely choose any partition according to their own needs for recovery operations. Before restoration, confirm the file content through the preview function to effectively avoid restoring incorrect files and improve the efficiency and accuracy of restoration.
- Support batch processing operations: Support batch file recovery. Users do not need to recover each file one by one. They can select multiple files to be recovered at once, which greatly saves time and effort. It is especially suitable for scenarios where a large number of files need to be recovered.
If Mac users need to complete partition recovery, they only need to follow these operation steps with Geekersoft Data Recovery.
Step 1 Go to the official website of Geekersoft Data Recovery and download the software installation package for the Mac version. After the download is complete, follow the prompts of the installation wizard to install the software, and then start the Geekersoft Data Recovery software.
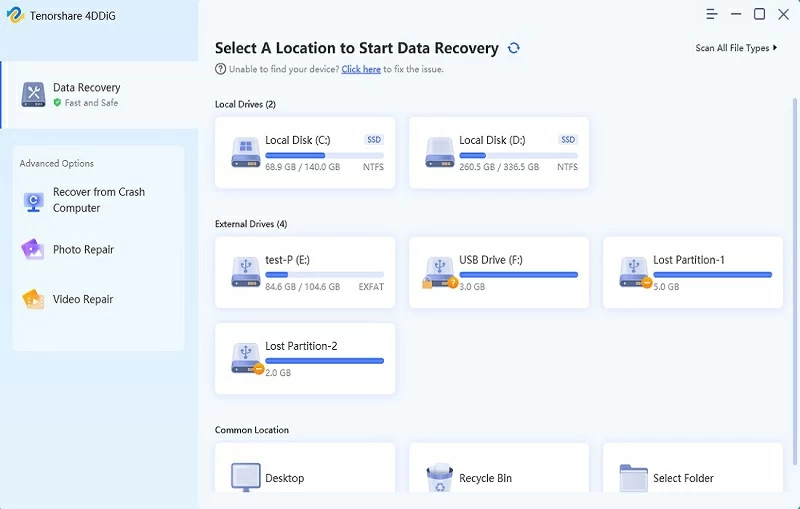
Step 2 In the Geekersoft Data Recovery software, click on "Data Recovery" > "Hard Disk and Location", and select the hard disk drive with the lost partition. After confirming that the selection is correct, click the "Start" button, and the software will immediately initiate the scanning process.
Step 3 After the software conducts a comprehensive scan of the system to find all the lost data in this partition, double-click the file to preview its content. Once confirmed to be correct, click the "Recover" button. If you need to restore multiple files, you can first select these files and then click the "Restore" button to retrieve multiple files at once.
If you are looking for a free data recovery tool to retrieve deleted partitions, TestDisk is undoubtedly a high-quality choice worth considering. It not only has a powerful partition recovery capability, capable of retrieving lost partitions, but also can restore non-bootable disks to their original state, providing reliable protection for the security of users' disk data.
The main highlights of TestDisk:
- Powerful exFAT file recovery capability: TestDisk can undelete files on the exFAT file system and even successfully copy files from deleted exFAT partitions.
- Quick Partition Recovery: It has the function of quickly recovering completely deleted partitions. Through its efficient scanning algorithm and intelligent analysis technology, it can quickly locate lost partition information and complete partition recovery operations within a relatively short period of time.
- Partition Table repair: The partition table repair function of TestDisk can detect and fix errors in the partition table, restore the disk partition to a normal state, and ensure the accessibility of data.
- Comprehensive analysis of non-bootable drives: For partition issues on non-bootable drives, TestDisk can conduct in-depth scans and analyses of all parts of the drive, providing detailed partition information and status reports to help users accurately identify the problem and take corresponding recovery measures.
With TestDisk, you can retrieve deleted partitions for free. The specific operation steps are as follows:
Step 1 On a Mac device, find and open the "Terminal" program through "Spotlight" or in the "Utilities" subfolder within the "Applications" folder.
Step 2 In the text input area of the terminal window, type "sudo testdisk" and press the "Enter" key. After entering this command, the system will ask you to enter the administrator password to obtain sufficient permissions to run the TestDisk software.
Step 3 In the pop-up prompt interface, select the "No Log" option and then press the "Enter" key again.
Step 4 The terminal interface will display a list of all hard disks that have been connected to the Mac device. Carefully review the list, click on the hard disk corresponding to the partition you want to scan with your mouse, and then press the "P" key on your keyboard. This operation will enable TestDisk to start the initial scanning and analysis of the selected partitions.
Step 5 Select the corresponding partition table type according to the system prompt. If you are using a new Apple Mac device, you should usually choose "EFI GPT"; For older PPC Mac devices, select "Mac", and after selection, press the "Enter" key to confirm.
Step 6 After confirming the partition table type selection, press the key corresponding to the "Analyse" option, and then press the "Enter" key. After that, select the "Quick Search" option, and TestDisk will start to quickly scan the selected partitions to look for possible missing partitions or files.
Step 7 After TestDisk has completed the scan and displayed all the recoverable files it has scanned, you can paste the files you want to copy into other folders to complete the recovery and saving of the files.
Data Rescue 6 for Mac is a powerful data recovery application, especially suitable for handling situations where files are completely lost and files are accidentally deleted from internal or external drives. If your Mac device is running macOS 10.12 or a later version, you can use this software to conduct a comprehensive scan of the internal system, thereby achieving a complete recovery of files.
Main highlights of Data Rescue 6 for Mac:
- Extensive support for storage types and file systems: This software supports a variety of different storage types, including common hard disk drives, SD cards, flash drives, etc., and is compatible with multiple file systems such as APFS.
- Flexible charging model: Free system analysis function is provided. Users can first use this function to conduct a comprehensive system inspection, understand the situation of data loss and the possibility of recovery.
- Diverse scanning mechanism options: Users can freely choose between deep scanning and fast scanning mechanisms based on factors such as the cause of data loss and time.
- Optimized user interface experience: The software is designed with multiple UI enhancement features, such as supporting operation in dark mode.
If you choose Data Rescue 6 for Mac to recover the partition, you can refer to the following operation steps:
Step 1 Download the Data Rescue 6 for Mac installation package from the official channel and complete the software installation according to the prompts of the installation wizard. After the installation is completed, start the software and select the corresponding file system and the type of files to be restored according to your needs in the software interface.
Step 2 Select "Quick Scan" or "Deep Scan" based on the actual situation, then click (Next). Then, the software will scan the specified content based on the user's selection.
Step 3 After the scanning process is completed, the software interface will display all the recoverable files that have been scanned. Check the file list, confirm the files that need to be recovered, then click the "Recover" button. Follow the prompts to select the location where the files are saved, and the file recovery operation will be completed.
PhotoRec is a partition recovery tool specifically designed for Mac users, capable of recovering lost files such as documents, archives, and videos from various storage media including CD-ROMs, hard disks, and digital cameras.
The main highlights of PhotoRec:
- Multi-platform support: Compatible with multiple operating systems such as Linux and macOS.
- Lossless recovery: Supports high-quality file recovery from multiple storage media.
- File system compatibility: Supports multiple file systems such as HFS+, exFAT, and ReiserFS.
- Special Optimization: Provide in-depth optimization support for the Tails system.
PhotoRec has relatively high requirements for users' technical knowledge. The specific operation steps are as follows:Step 1 Open your Mac and use the following specified command to install Homebrew:/ bin/bash - c "$(curl - fsSL https://raw.githubusercontent.com/Homebrew/install/master/install.sh)"
Step 2 Enter "brew install testdisk" in the terminal, and then press the Enter key. TestDisk will immediately start the installation process.
Step 3 Open the terminal again, Enter "sudo photorec" and then press the Enter key.
Step 4 Select the media devices that need to be scanned from the list. Then, determine the storage device to be scanned and the corresponding file structure, and specify a location for recovering and saving the lost partition data.
Step 5 The scanning process will start automatically. Please wait patiently until the scanning is completed to achieve a full recovery of the data.
FileSalvage, as a highly practical data recovery software, can help users effectively retrieve files and partitions that were deleted due to accidental operations. This software is powerful. It not only supports the recovery of partitions from uninstalled and mounted devices, but also can be applied to a variety of different file systems, providing great convenience for users' data recovery work.
The main highlights of FileSalvage:
- Efficient scanning and processing: FileSalvage boasts outstanding performance, and its scanning and processing speeds are highly anticipated.
- Available Space scanning feature: For Mac users using Intel-based software, FileSalvage has specially introduced the available space scanning feature.
- Advanced Intel Mac Optimization: This software offers dedicated optimization features for advanced Intel Mac users.
- Flexible operation in Expert Mode: FileSalvage features an expert mode, providing users with a certain technical foundation with greater operational flexibility, meeting personalized data recovery needs in various scenarios and further enhancing the effectiveness of data recovery.For information on how to perform partition recovery using FileSalvage, please refer to the following operation steps:
Step 1 Download and install the FileSalvage software from the official source site. Launch the software to find the recently deleted files.
Step 2 In the software interface, select the drive where you need to search for the deleted partition.
Step 3 From the search results, select the files or partitions you need to recover. After confirming that the selection is correct, activate the corresponding recovery command and follow the software prompts to complete the subsequent operations to successfully restore the data.
To ensure the security of your data, Mac devices can take the following measures to prevent partition loss issues.
1. Data backup: The top priority is to use cloud backup services (such as Dropbox or Google Drive) to fully back up all data in case partitions are suddenly lost.
2. Operate partitions with caution: When performing the disk partitioning step, carefully check the operation to avoid mistakes.
3. Use anti-virus solutions: Although macOS devices have comprehensive security protocols, adding an auxiliary anti-virus system can provide double protection.
4. Avoid multiple booting: Apple does not support multiple booting, especially in many older versions of macOS. Therefore, it is best to avoid multiple boots on the system to prevent serious problems such as partition loss caused by operational errors.
The above is what we have introduced to you about the types of disk partitions on Mac devices, the common causes of partition loss, and several effective solutions for preventing and recovering disk partitions. Among them, Geekersoft Data Recovery is highly praised by users for its advanced technology and outstanding recovery success rate, and is their first choice for disk partition recovery.