- Data Recovery
- Data Recovery for PC
- Data Recovery for Android
- Data Recovery for iPhone/iPad
- Unlock For Android
- Unlock for iPhone/iPad
- Android System Repair
- iPhone/iPad System Repair
Updated By Cameron On Apr 13, 2026, 9:25 pm
The situation of accidentally deleting files is far more common than people imagine. Therefore, if you have also accidentally permanently deleted files in Windows 10, please rest assured that you are by no means an isolated case. In most cases, users will use the shortcut key (Shift + Delete) or directly empty the Recycle Bin to permanently delete files. However, file loss may also be caused by reasons such as virus attacks, system errors, sudden power outages or storage device malfunctions. Even if the file is permanently deleted, you still have the opportunity to restore it through the correct tools and methods. We will introduce in detail five simple and free Windows 10 file recovery methods to help you easily retrieve lost data.
Sure. You have multiple ways to recover permanently deleted files on Windows 10, such as using "File History", backup recovery, shortcut Restore, and other practical methods. Many people mistakenly believe that once a file is deleted, it disappears forever. In fact, this is not the case. Even if files are deleted, they usually still exist in the storage device, but are marked as "invisible" by the system. Specifically, when a file is deleted, Windows 10 hides it and marks the space it occupies as "overwritable". As long as the space is not overwritten by new data, deleted files can still be recovered. Therefore, as long as you do not store new content on the corresponding drive, the chance of successfully recovering data is very high. Conversely, if the space where the deleted file is located is occupied by a new file, the possibility of recovery will be greatly reduced, and it may even lead to permanent data loss.
In most cases, deleted files will first go to the "Recycle Bin". You can directly double-click the Recycle Bin icon on the desktop to open it, or press the Windows key + S and then search for "Recycle Bin" to enter. In the Recycle Bin, you can view and restore recently deleted files. However, if you use the Shift + Delete shortcut to delete a file, it will be permanently deleted without going through the Recycle Bin. In addition, if "Do not move files to the Recycle Bin" is checked in the system Settings. If you delete a file immediately after removing it, all the deleted files will skip the Recycle Bin, making it impossible to retrieve them through regular means. It is recommended that you check your Recycle Bin Settings to ensure that this option is not enabled.
What should I do if I accidentally delete a file in Windows 10? Don't panic. We have sorted out 6 simple and free recovery methods for you to help you easily retrieve important data.
If a file has just been deleted and no other operations have been performed yet, the quickest way to recover it is to press the keyboard shortcut Ctrl + Z or right-click on an empty area and select "Undo Deletion".
Note: This method is only effective when no other operations have been performed after deletion and is suitable for recovering individual files or entire folders.
The Recycle Bin is the built-in "safety net" of the Windows system. The operation steps are as follows:
Step 1 Double-click the Recycle Bin icon on the desktop, or use the Windows key + S to search for "Recycle Bin"
Step 2 Find the file you need to restore in the Recycle Bin, right-click on it, and select "Restore". The file will automatically return to its original location.
If the above methods fail to help you retrieve the lost video, try using the Geekersoft Data Recovery tool. This is a professional data recovery software that can effectively recover all kinds of
lost files on Windows. One of the major advantages of this tool is that it supports both internal drives (such as computer hard disks) and external storage devices (such as USB flash drives and portable hard disks), making it widely applicable. In addition, Geekersoft Data Recovery can not only recover various file types, but also is easy to operate and suitable for non-professional users.
The specific steps for retrieving data using Geekersoft Data Recovery are as follows:
Step 1 Download and install the Geekersoft Data Recovery tool on your computer. After the installation is complete, double-click the shortcut to start the program.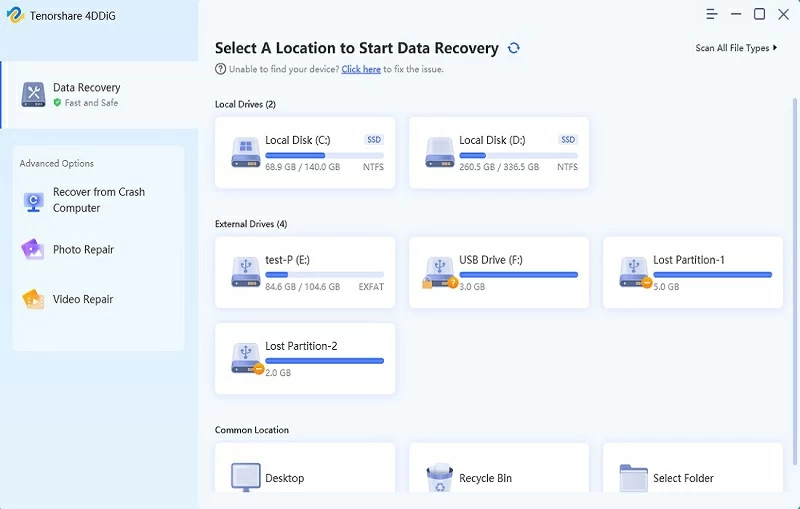
Step 2 In the software interface, first select the drive where the lost video was originally located for scanning. Next, specify another different drive as the save location for the recovery files.
Step 3 After the scanning and recovery process is completed, go to the designated target drive to view all the successfully recovered files.
Important Note: Be sure to perform recovery operations using different drives to avoid data being overwritten. Writing new data to the original drive will significantly reduce the success rate of recovery.In addition to "File History", Windows 10 also inherits the classic "Backup and Restore" function. If you have ever used this function to create a system backup, you can retrieve the files from it even if they have been permanently deleted. This method must also have the Windows backup plan configured and run before the data is lost. The operation steps are as follows:
Step 1 Turn on the "Backup and Restore" function. In the Start menu search or taskbar, enter and open the "Control Panel".
Step 2 Change the viewing method to "Category", and then enter the "System and Security" section.
Step 3 Click the "Backup and Restore (Windows 7)" option. In the opened window, find and click the "Restore My Files" button.
Step 4 View the contents of the backup library. You can find and select the deleted files you want to recover through the browsing or search function.
Step 5 Click "Next", and then select to restore the file to its original location or a new location. Finally, click the "Restore" button to complete the operation.
The "File History" feature built into Windows 10 is a powerful data recovery tool. It enables i to easily restore files to earlier versions by regularly backing up the contents of your personal folders (such as documents, pictures, etc.). However, this method must have the "File History" function pre-set and enabled before the file is lost. If it is not enabled, this method cannot be used. The operation steps are as follows:
Step 1 Enter the directory that contains the deleted files or folders. Right-click on the folder (or the root directory of the drive disk where it is located) and select "Properties".
Step 2 In the pop-up properties window, switch to the "Previous Versions" TAB. The system will list all available historical backup versions of this folder. Based on the time information, select a version of the file before it was deleted.
Step 3 Click "Open" to preview the content of this version. After confirming that it contains the files you need, click the "Restore" button to restore the files to their original location.
Microsoft officially provides a free tool called "Windows File Recovery". Although it is based on command-line operation, it is practical in function and can recover files from various storage devices such as local hard drives, USB flash drives, and SD cards. The following are the specific steps to use this tool:
Step 1 Please search for and download "Windows File Recovery" from the official Microsoft Store. After the installation is complete, start the Command Prompt (CMD) or Windows PowerShell as an administrator.
Step 2 In the opened command line window, you need to enter the recovery command in the specified format:
textwinfr Source drive letter Target drive letter [/ mode] [Parameters]
For example, if you want to recover a specified document from drive C to drive E, you can refer to the following example
Regular mode (applicable to NTFS file system quick recovery) :
textwinfr C: E: /regular /n \Users\Documents.docx
Extended mode (applicable to FAT/exFAT or deep scan) :
textwinfr C: E: /extensive /n \Users\Documents.docx
Step 3 After the tool is run, the command line interface will prompt that the operation needs to be confirmed. Enter "Y" to continue. The program will automatically generate a folder named "Recovery_ [Date and Time]" on the target drive (such as the E drive in this example), and all recovered files will be saved in it. After the restoration is completed, you can view the retrieved files in this folder.
The above are the various free file recovery methods on Windows 10 that we have introduced to you. The key to successful recovery lies in: once file loss is detected, immediately stop storing any new data to the disk to prevent the original data from being overwritten, which may lead to recovery failure. Moreover, data security lies in prevention before problems arise. Regularly and automatically backing up important files to external drives or network locations is the most effective and reliable way to prevent data loss.