- Data Recovery
- Data Recovery for PC
- Data Recovery for Android
- Data Recovery for iPhone/iPad
- Unlock For Android
- Unlock for iPhone/iPad
- Android System Repair
- iPhone/iPad System Repair
Updated By Cameron On Feb 5, 2023, 10:15 pm
Many users reported that the Windows 11/10 built-in voice recorder is not ideal for use. And its recording effect is not good, and it is prone to be crash. Here, we will introduce you how to use Windows 11/10 recorder. A professional computer recording program will also be introduced, which supports simultaneous recording of computer system sounds and environmental sounds, and output high quality audio files.
On the basis of comparing the two recording tools (Windows 10 Recorder&Screen Recorder), help you choose one of them as your "Recording Assistant"!
In order to ensure the smooth completion of our recording work, we need to make preparations in advance before performing Windows recording:
Step 1 Test whether the computer audio output/input device, built-in speakers, headphones, microphones, etc. can work normally.
Step 2 Ensure that the recording environment is quiet and free of noise.
Step 3 Download and install the appropriate recording program.
Step 4 Determine whether you want to record the computer system/microphone sounds separately or both.
Step 5 Before the formal recording, test the recording process to ensure that the program can receive the sound normally. At the same time, adjust the volume of the sound device as required.
In order to complete the Windows 11/10 computer recording task easily and quickly, we recommend you use a professional and practical recording program - Screen Recorder. It has advanced recording technology programs, audio, video and screen recording in one.
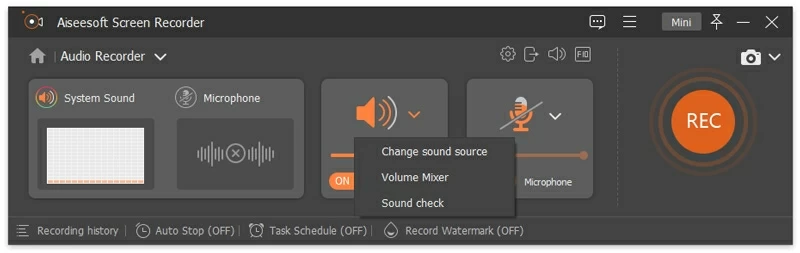
Support pre-recording sound check to change the recording environment or adjust the volume of the sound device.
Audio, video and screen recording are integrated to better record any content of online meetings/courses.
Ability to simultaneously record computer system sound effects, including the sound of built-in speakers/microphones.
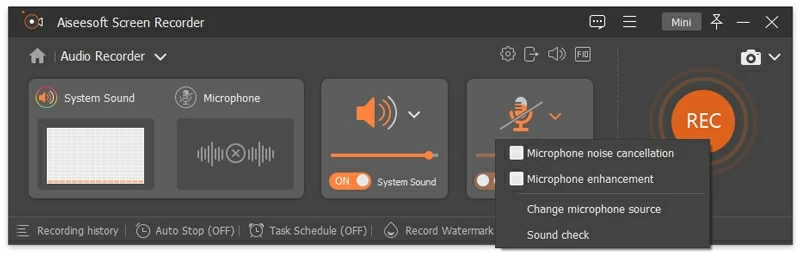
Support microphone noise reduction/enhancement to effectively reduce microphone noise and improve the quality of output audio files.
Support custom output file quality/format (MP3, WMA, M4A, AAC).
Support recording planning tasks, easily realize the reservation of recording, and ensure not to miss the recording of any online symposium/meeting.
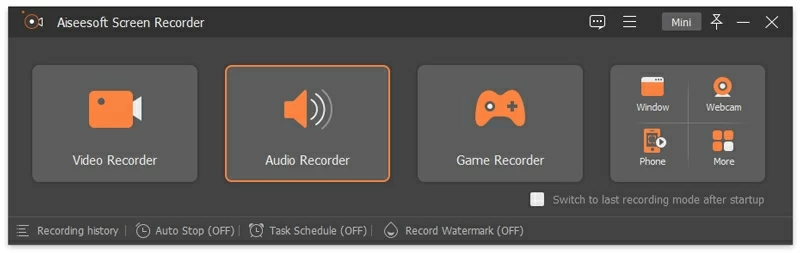
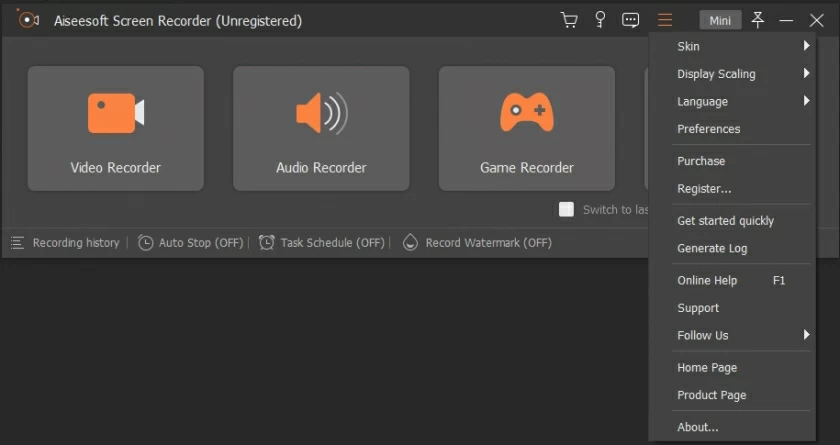
1. Download, install and start the Screen Recorder. Then open the software and click "Audio Recording" on the home screen.
2. Select an appropriate recording mode based on the recording requirements. At this point, you will see the spectrum diagram of two sound effects devices (speaker/microphone) and the start button on the screen.
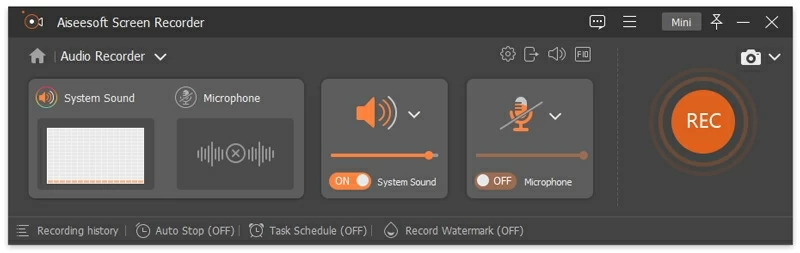
If you need to record the sound of the computer, start the "System Sound" recording mode, and turn off the "Microphone" button at the same time to prevent the software from recording the background noise.
If you want to record offline training sessions, meetings, and other ambient sounds, start the microphone mode.
Please note that the spectrum display on the left side of the software can help you see if the sound device is working properly.
Tips: "Microphone noise reduction" and "microphone enhancement" functions can make the recorded audio clearer and enhance the quality of the output audio. In addition, before the formal recording, you can conduct a sound test to avoid unexpected situations during the formal recording.
3. Customize recording software Settings
To make it easier to use, you can also customize the Settings of the recording software. The specific operation is to click the "≡" icon at the top of the interface, set the format/quality of of the recorded file, sound device and so on. In addition, you can also set the fast keys according to your own habits so as to improve the operating experience! Then, click OK to complete the Settings.
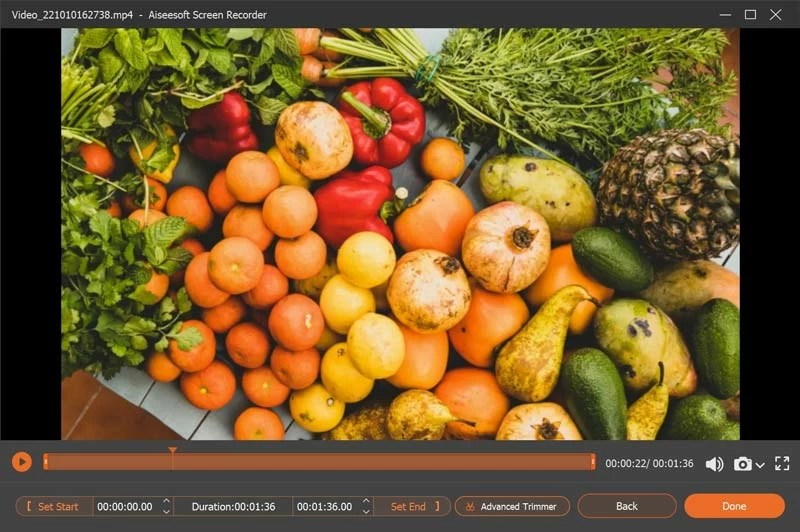
4. Start recording
Click "REC" to start recording. In the recording window, you can adjust the recording volume at any time. In addition, after clicking the "Alarm Clock" icon, you can also enable the automatic stop recording function, set the program according to the recording duration, file size, stop time and other parameters, and automatically save the output file to the corresponding folder after the recording operation. Of course, the automatic stop function can also be set before recording.

5. Save the recorded file to the computer
After recording, you can listen to the recorded file. Then, you can also edit and save to a computer, laptop or even cloud.
In short, based on professional technical support, Screen Recorder provides rich functions, and its interface is clear and concise. You can complete the recording by clicking the mouse according to the prompts!
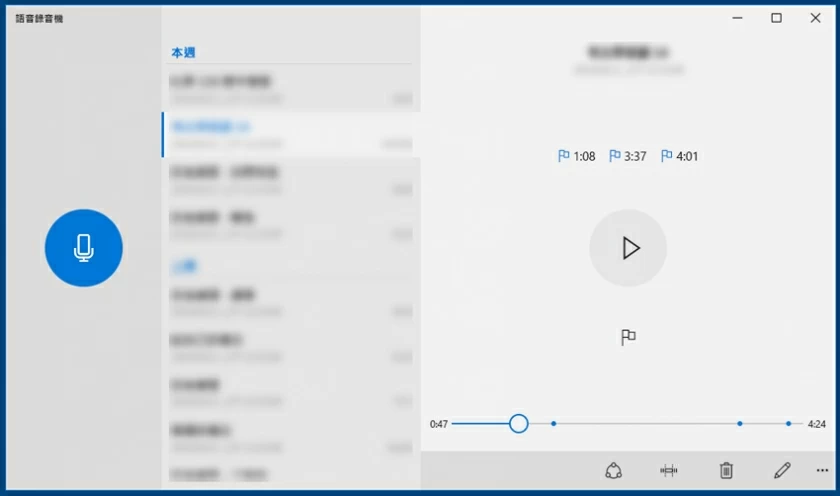
As we all know, the built-in "voice recorder" in Windows 10 can help users easily record music or movie sounds played by computers. At the same time, it also provides pause and "mark" functions.
Step 1 Click the "Computer" icon>"Voice Recorder" application.
You can complete the microphone parameters setting by clicking "Settings" before using the voice recorder.
Step 2 Click "Record" on the recorder to start recording>play the sound clip.
During the recording process, you can click "Add Tag" at any time to make comments at any time, which is convenient for subsequent editing.
Step 3 Click "Stop Recording" to end the recording. Later, you can edit the recording files as needed.
The above is an introduction to Screen Recorder and Windows 10 voice recorder. You can choose according to your needs. Among them, the voice recorder of Windows 10 is also relatively basic, but it does not occupy additional memory; The Screen Recorder has more powerful and complete functions. Especially when you have a high demand for live broadcast, online conference/lecture/course recording, professional Screen Recorder is a better choice, which can better meet your needs for offline recording, video and screen recordings. It has been highly praised by many teachers, Internet celebrities, online audio producers and online salespeople. Download and install the Screen Recorder quickly. It will not let you down.