- Data Recovery
- Data Recovery for PC
- Data Recovery for Android
- Data Recovery for iPhone/iPad
- Unlock For Android
- Unlock for iPhone/iPad
- Android System Repair
- iPhone/iPad System Repair
Updated By Tom On Dec 13, 2022, 8:40 pm
Screen Recorder is a versatile computer screen recording tool, which can meet various screen recording needs such as game tutorial production, live video recording, online course recording, and tutorial Vlog production. This article describes in detail how to use the Geekersoft Recorder(Screen Recorder) to record computer screen and sound and output DH videos.
1. Download, install and start the software for free. Please use the email address and registration code you received to complete the registration and activation of VIP users.
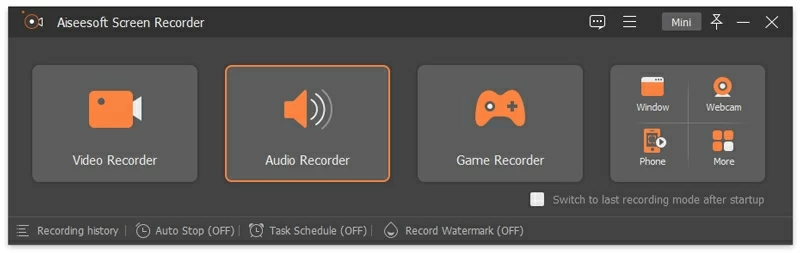
2. On the toolbar of the software, click the Video Recorder option to enter the video recording window, where you can record computer pictures and sounds at the same time.
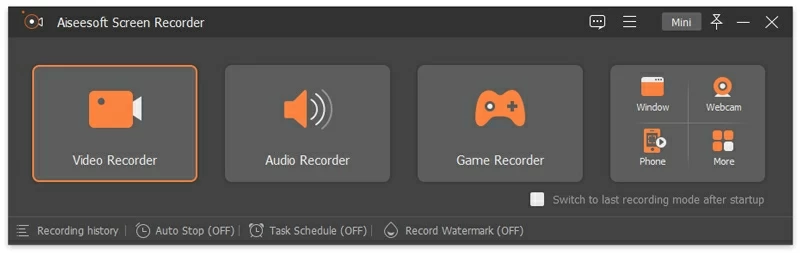
3. Next, you can select Full or Customize options, such as 1920 * 1080, 1280 * 720, 854 * 480, 1024 * 768, 640 * 480 and other parameters. You can also click Customize>Select region/windows, then click and drag the mouse to select the screen recording area.

4. Determine whether to enable system sound recording and microphone sound recording according to your needs. For users who want to record online courses, teleconferencing or video tutorials, game tutorials, you may need to open both System Sound and Microphone options.

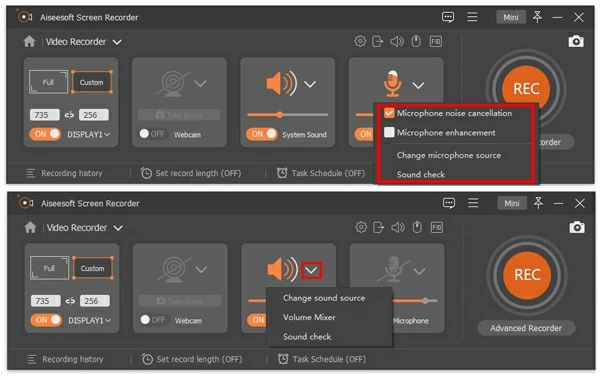
5. In addition, you can click the drop-down option and select Enable Microphone Noise Cancellation and Microphone Enhancement, or open the volume mixer to adjust the volume of other applications or check the sound.
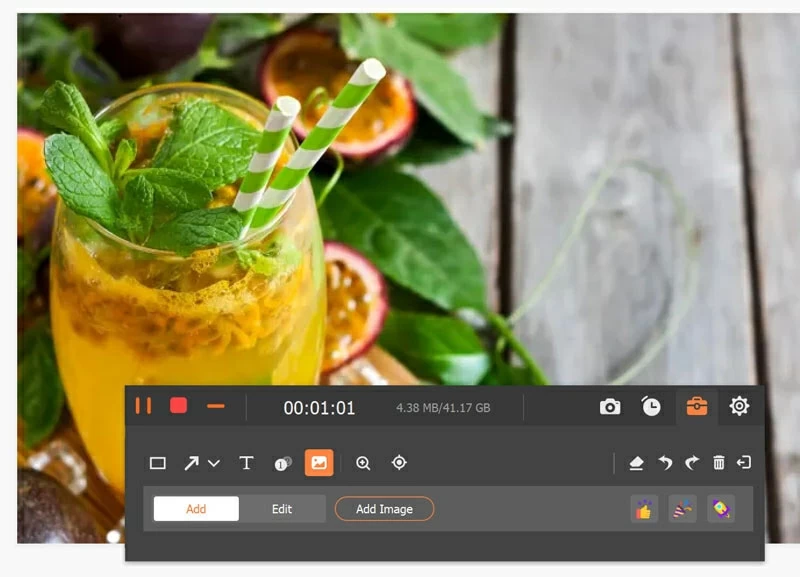
6. During recording, you can add text, lines, arrows, specific labels, pictures, etc. to explain the contents of the recording.
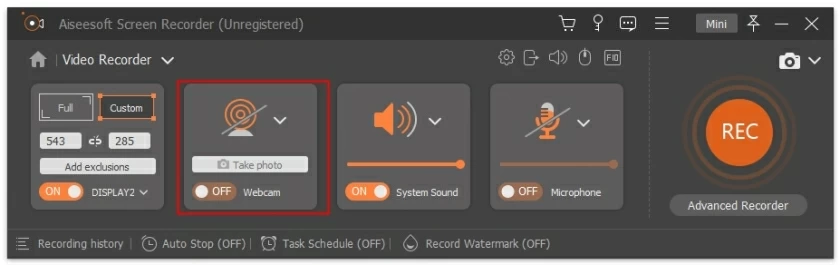
7. If you want to record camera at the same time, just enable the Webcam option.
8. After setting up, click the red REC button to record the computer screen. After recording, you can preview the recorded video by clicking the Stop button, and then click the Save button to save the screen to your computer.
Tips: All of your video or audio recordings are saved in the Record History list. You can click Record History at the bottom to view, edit or delete them.
Some users want to record only audio and not computer images. TheGeekersoft Recorder(Screen Recorder) can also meet this requirement.
1. After launching the software, click the second option Audio Recorder in the toolbar.
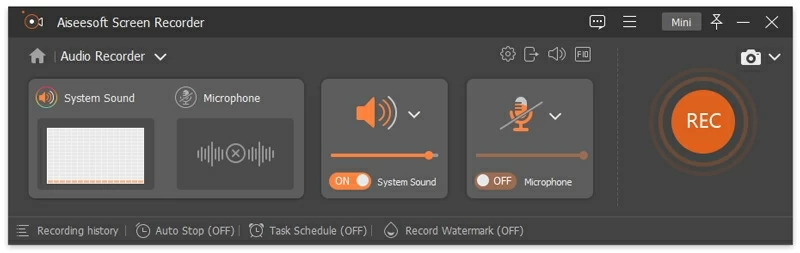
2. Determine whether to enable system voice recording and microphone voice recording according to your needs. If you only want to capture speech, you can turn on the Microphone option and disable System Sound. If you also want to capture computer system sound, you will need to enable both the Microphone and System Sound options.
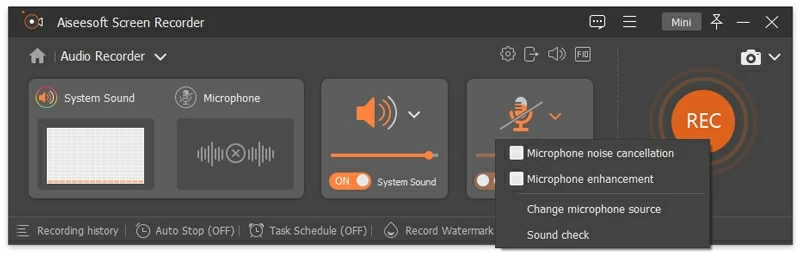
In the drop-down option of microphone, enable microphone noise cancellation and microphone enhancement to reduce video noise or amplify audio, so as to prevent the problem of large echo in recorded audios. If you have more than one microphone, simply select "Change microphone source" to select the one you want to record.
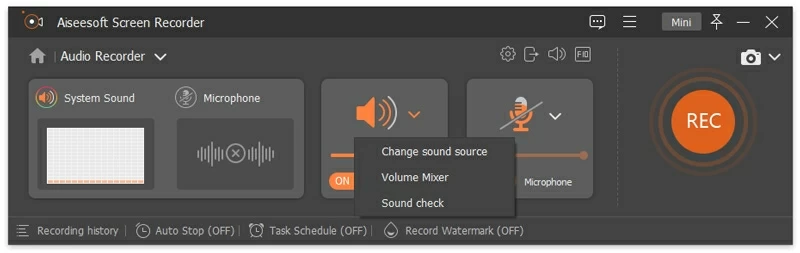
The drop-down option next to the speakers allows you to change the recorded sound source.
Once you have started recording the audio, you can drag the slider to adjust the volume to the appropriate value.
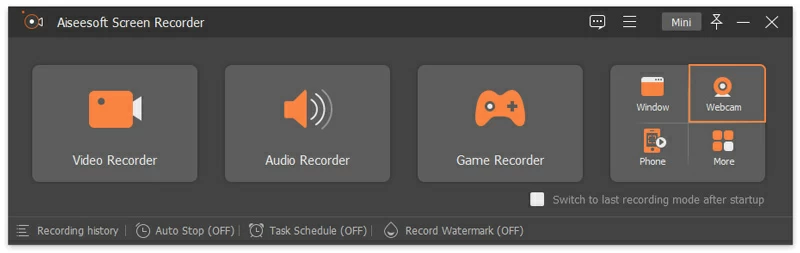
1. Turn on the screen video recorder on your computer and then go to the Camera option on the right panel.
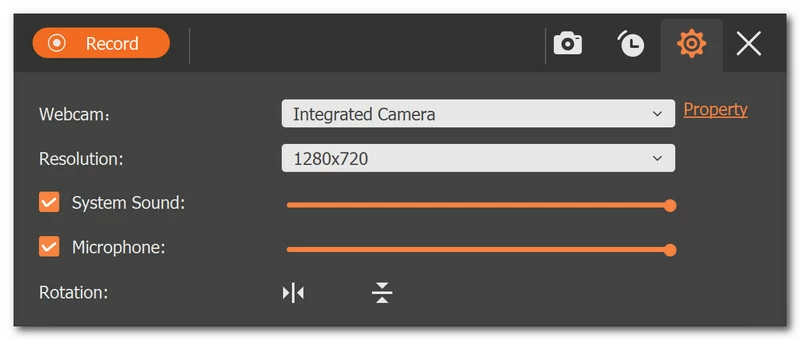
2. Next, you can change the source camera, adjust the camera effect, select the resolution, modify the volume, and rotate the image. Once you have done all the configuration, click Record at the top to start recording.
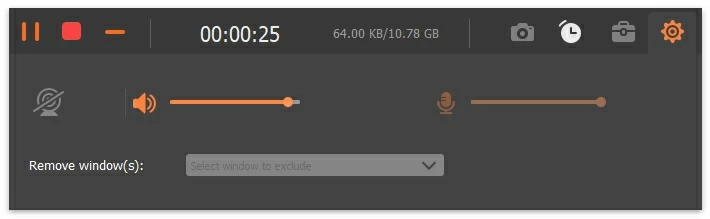
3. During recording, you can pause or restart the recording.

4. After recording, you can preview and clip the video as needed, and click Export to save the video to the computer.

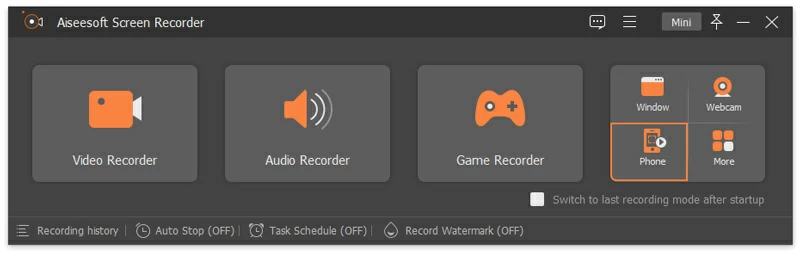
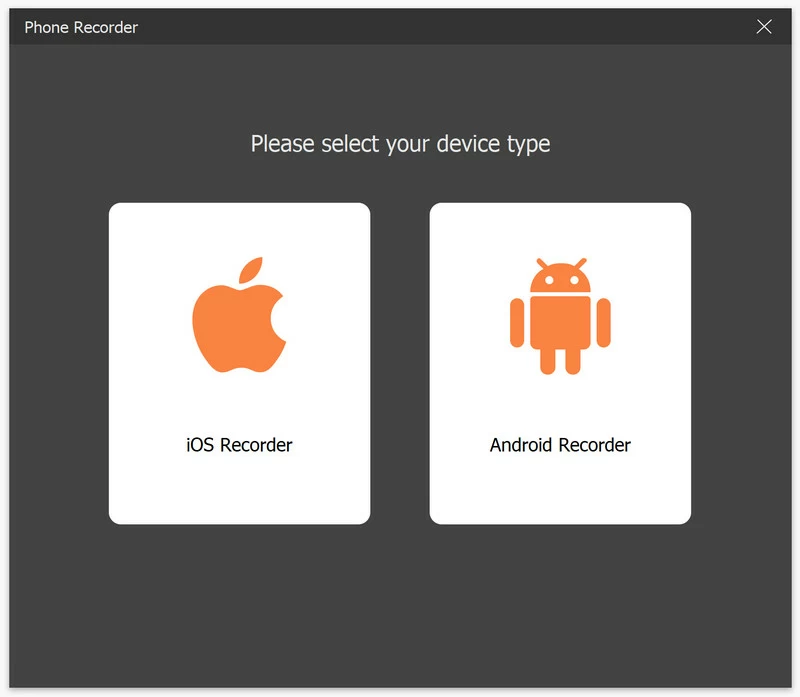
1. After starting the software, if you want to record the iPhone or Android phone screen, please click the Phone option in the right panel.
2. Select iOS or Android channel according to your needs. If you want to record the iPhone screen, you need to place the phone's screen on your computer first.
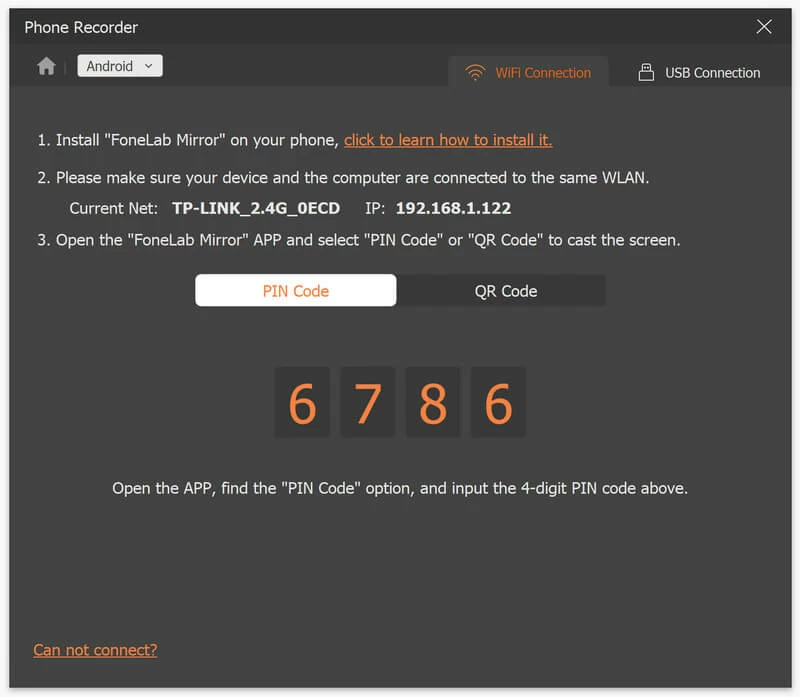
3. Android users can choose to use WiFi or USB to display their phones. We also offer you two WiFi connection modes: PIN code and QR code. You can choose any one as your needs.
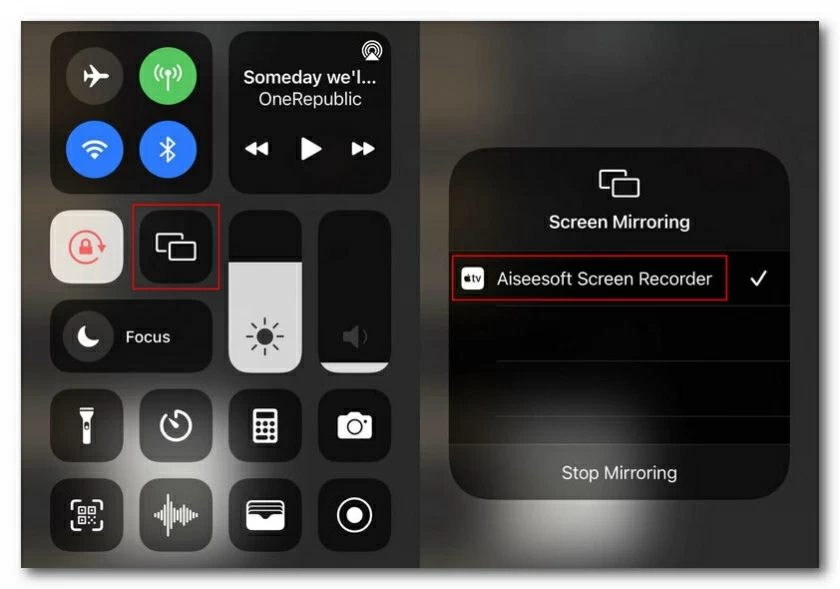
4. To put your iOS device on your computer, you need to make sure that your iPhone and computer are connected to the same WLAN. Then slide down from the top of the iPhone to open Control Center, look for the Mirror icon, and select Screen Recorder.
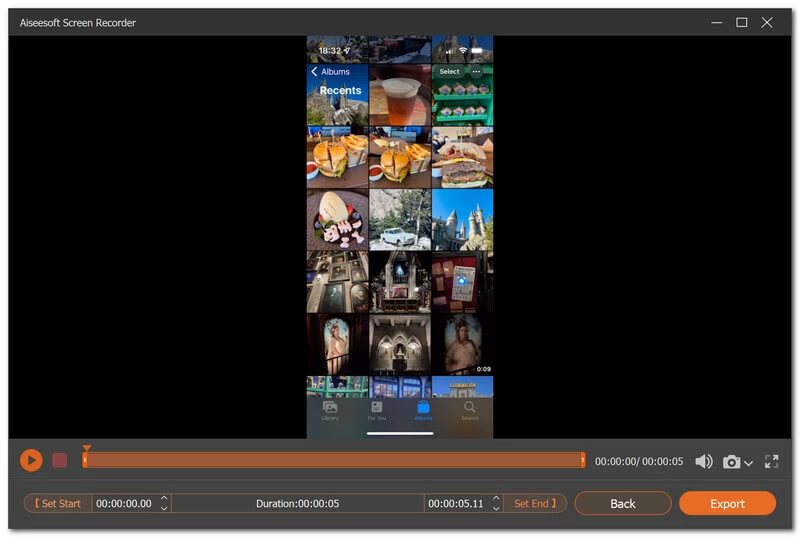
5. After connecting, you can view and record your phone screen on the computer.

6. When recording is completed, you can edit the video as required and save it.
After you save the recording file, you can further clip the audio, split the video, compress the video, merge files, convert files, or make better edits to the video.
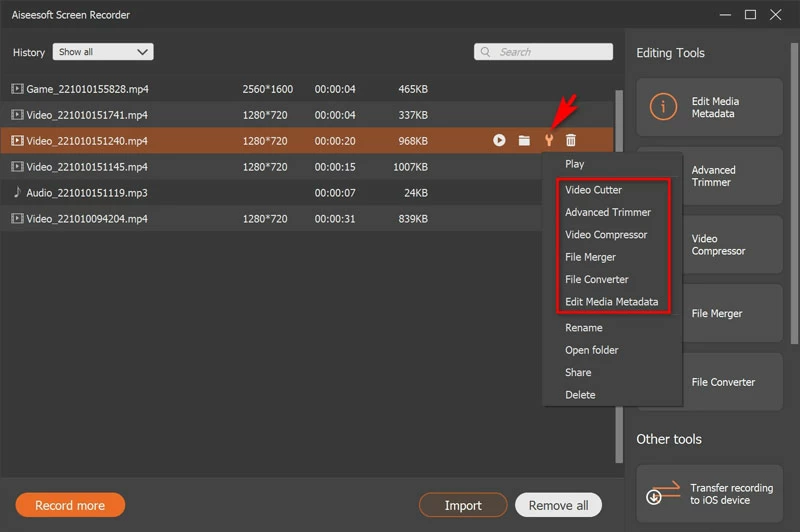
1. Split video
Enter the drop-down option of More Tools and select Video Cutter.
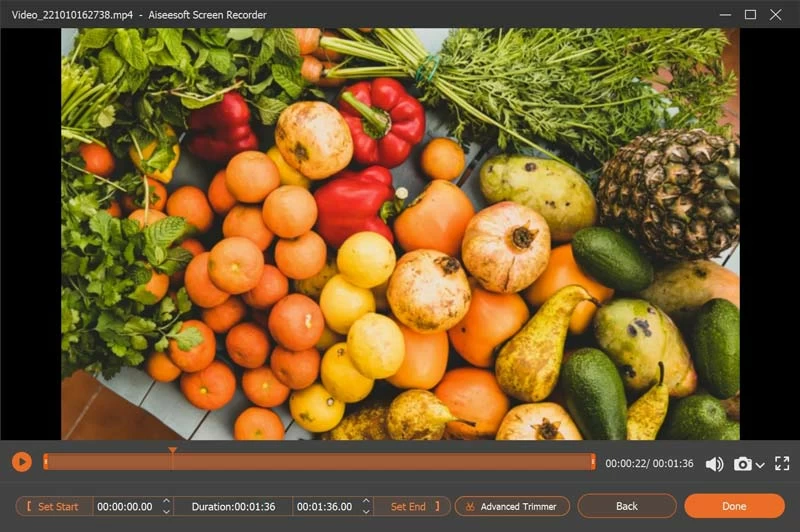
The Video Cutter window appears.
Then move the progress bar to confirm the start and end points.
Click the Done button to save the part you want to save.
Note: You can click Stop Recording to enter the video clip interface from the preview window.
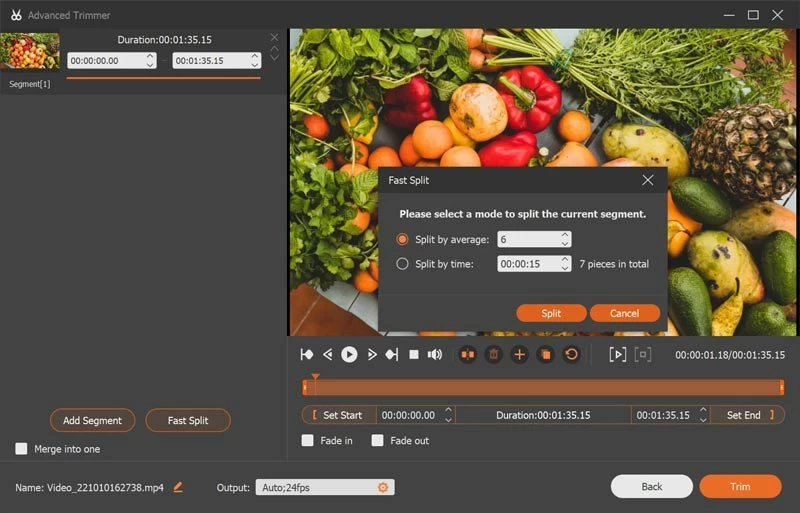
2. Advanced Trimmer
Go to Advanced Trimmer from the drop down option.
There are 2 options of this tool.
Add segment: You can move the processing bar in the right panel to create new clips, copy and paste clips, or split files.
Fast Split: You can divide a recording file into multiple parts according to the average file or time. Finally, click Trim to confirm your operation and export it to your computer.
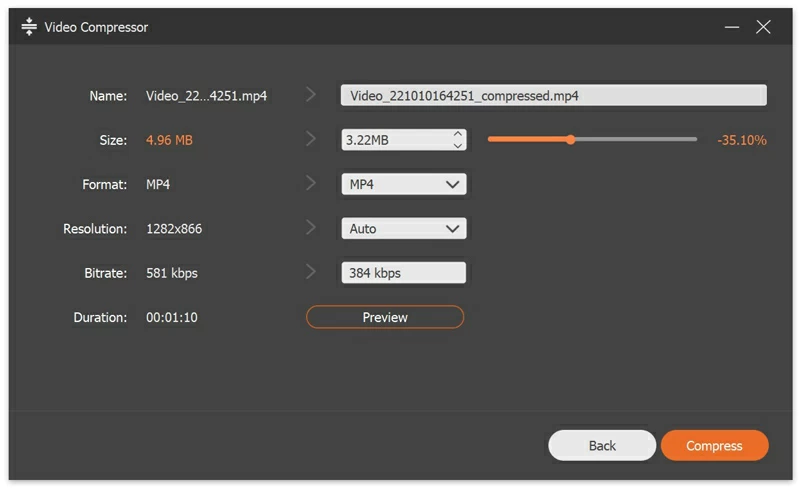
3. Compressed video
If you want to compress the size of the recorded file, you need to find Video Compressor and enter the More Tools drop-down option.
Move the file size bar to confirm the size of the video you want to save.
After all the clips are ready, click the Export button to save the merged file on your computer.
4. Merge files
Find the File Merger option in More Tools.
You can then click the plus icon to import photos, videos, or audio from your recording history or your computer.
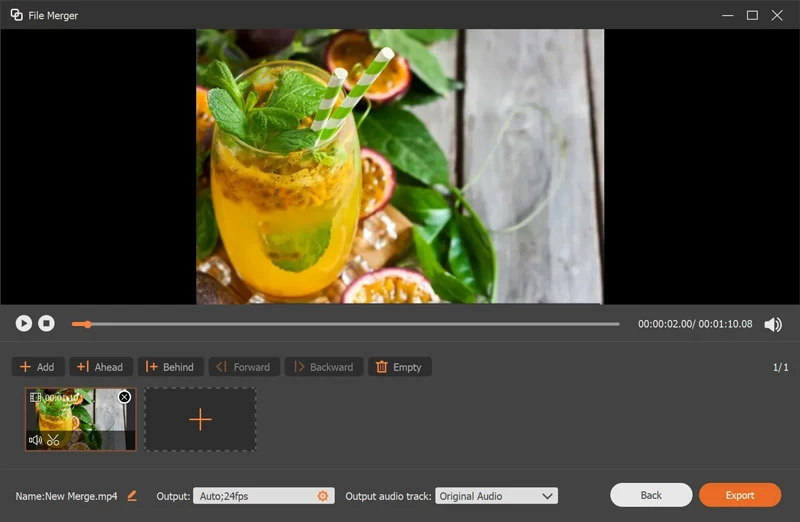
Then, click the Import button to save the merged file to your computer.

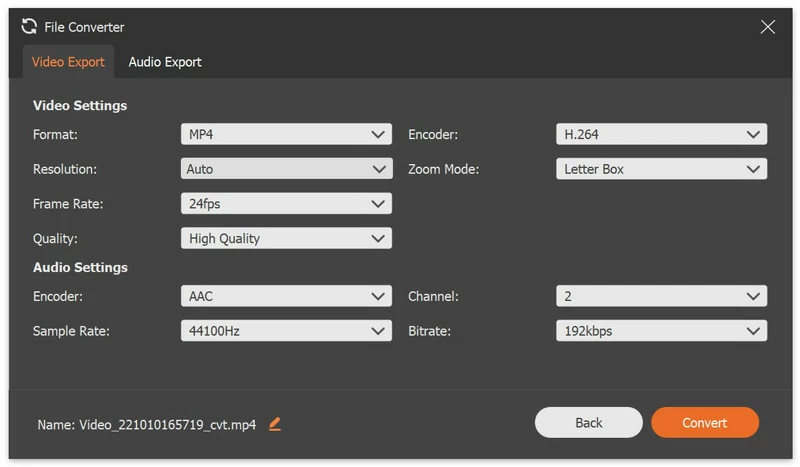
5. Convert the file format
When you are unable to play a recorded file on your device, you will need to convert the video or audio format using a File Converter.
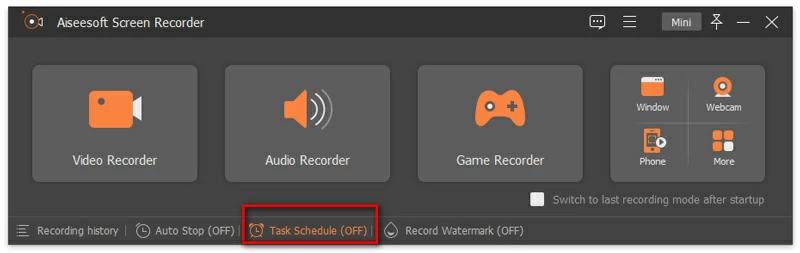
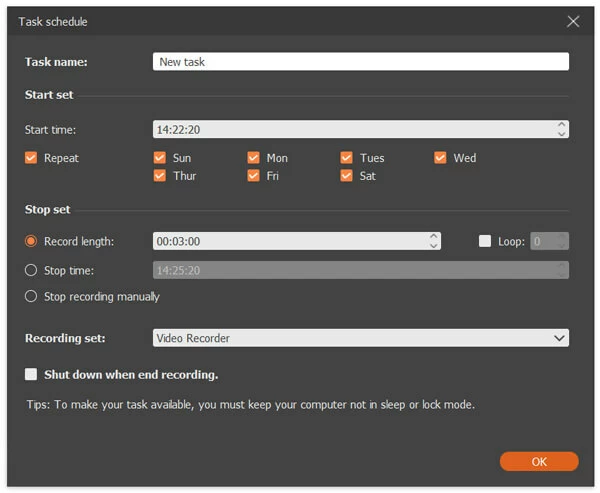
1. Start the software and click Task Schedule at the bottom to set a recording task.
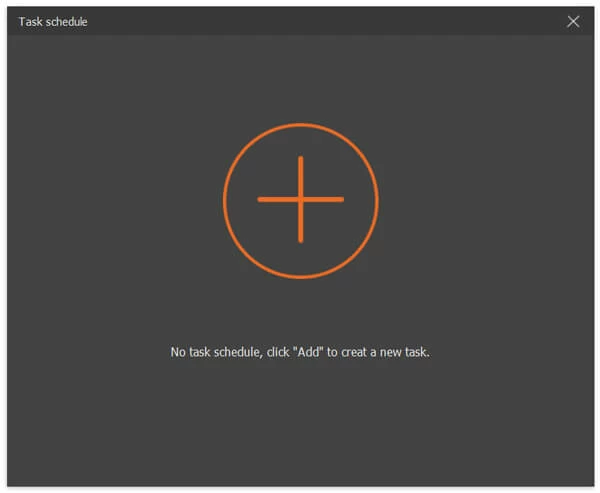
2. In the "Task schedule" window, click the plus button to add a new task. Enter the name and click OK to start.
3. Then, you can set the start time, end time, and length of the recording.
After recording, you can enter Settings to adjust various recording conditions.
1. Recording
Under the Recording option, you can make adjustments as needed, such as displaying the countdown before recording, making a beep at the beginning of recording, displaying the recording boundary, and hiding the floating bar during recording.
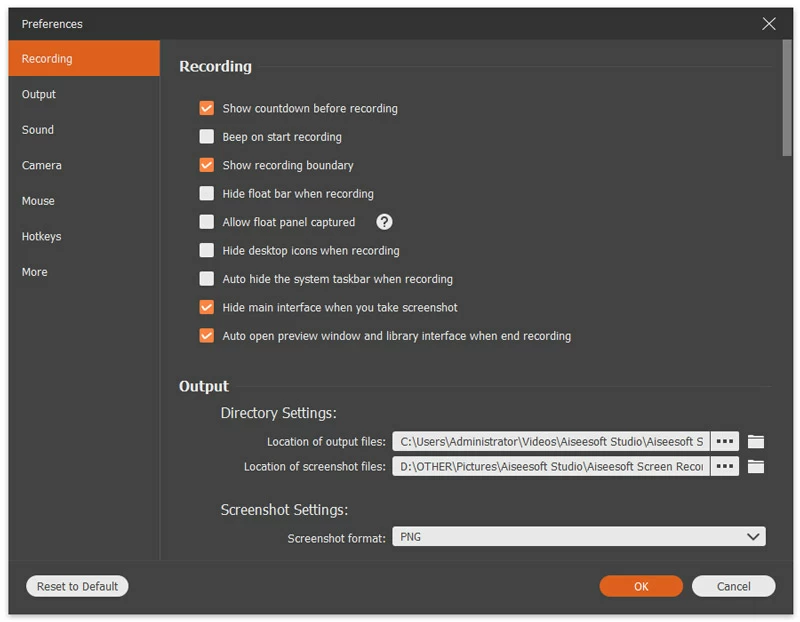
2. Output
Under this column, you can select the output folder of records and screenshots according to your needs. In addition, you can set the video/audio format and quality, video codec and frame rate, and screen capture format.

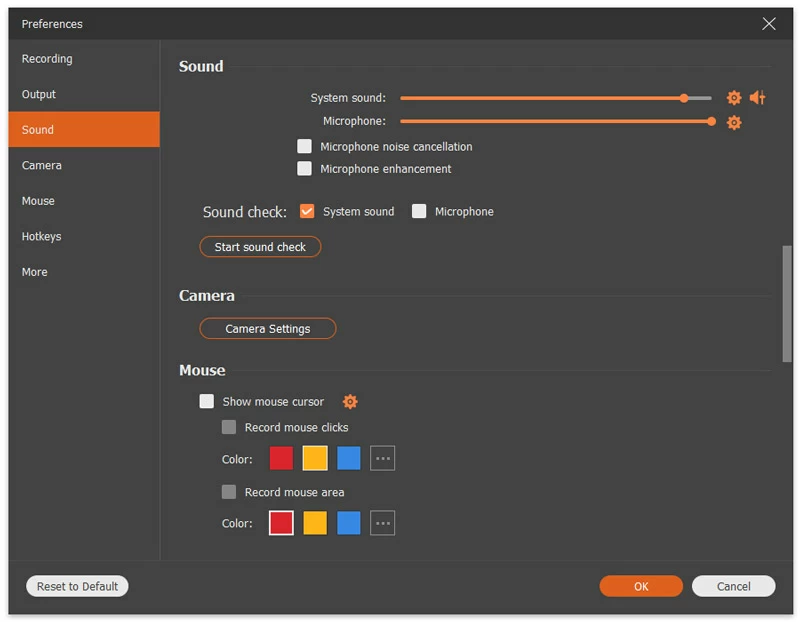
3. Sound
The Sound settings allow you to select the system sound and the sound source of the microphone.
In addition, you can adjust the volume of your system sound and microphone by moving the slider.
You can enable microphone noise cancellation and microphone enhancement to create high-quality microphone audio recordings.
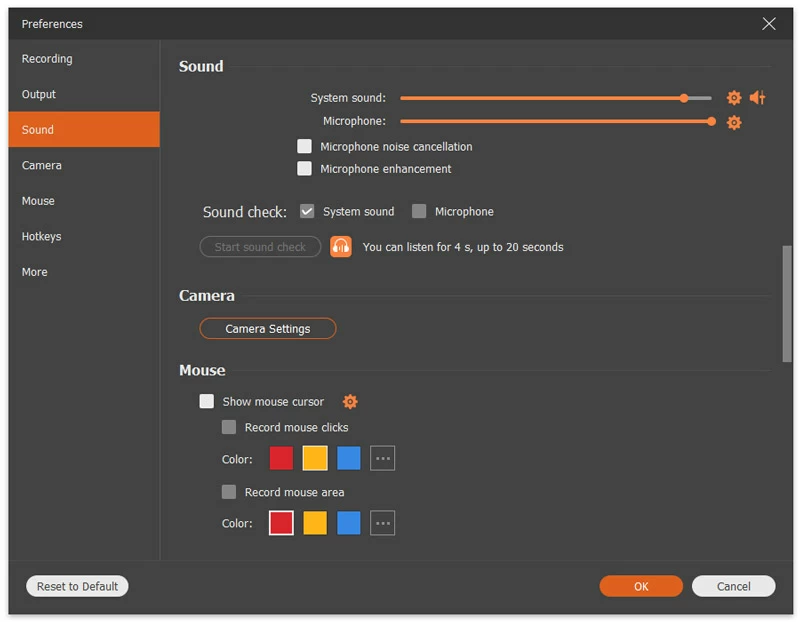
You can click to test the audio before recording.
Then it will start recording. Click the microphone icon next to Start Sound Check to stop the recording, and then click the icon again to listen to the audio recording.
4. Mouse
In the Mouse section, you can choose whether to display the mouse cursor, and flexibly adjust the number of mouse clicks and mouse area.
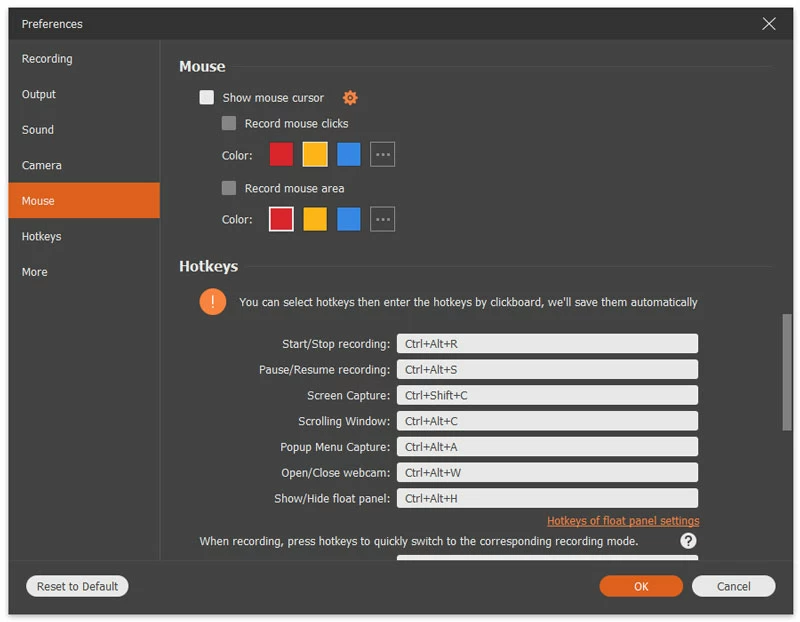
5. Shortcut keys
In the shortcut key tab, you can enter a combination key as the hotkey for starting/stopping recording, pausing/resuming recording, screenshots, turning on/off webcams, and showing/hiding the floating panel.
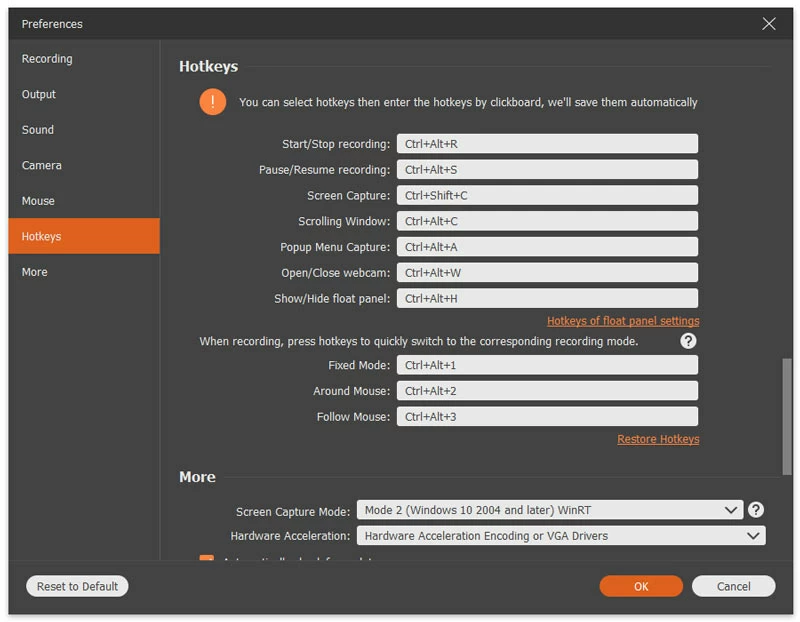
Step 6: Others
The new "Other" teb enables hardware acceleration, automatic updates, and more.
